HOW TO INTEGRATE YOUR SARSS imageEZ® PRINTER WITH GCSS-ARMY
FOLLOW THE STEP-BY-STEP INSTRUCTIONS AND YOU'LL BE SET UP IN NO TIME
|
HOW TO INTEGRATE YOUR SARSS imageEZ® PRINTER WITH GCSS-ARMYFOLLOW THE STEP-BY-STEP INSTRUCTIONS AND YOU'LL BE SET UP IN NO TIME
|
|---|
SET UP TAKES LESS THAN 5 MINUTES
You may find it helpful to print out these instructions before you begin. Click here to print the page.
![]()
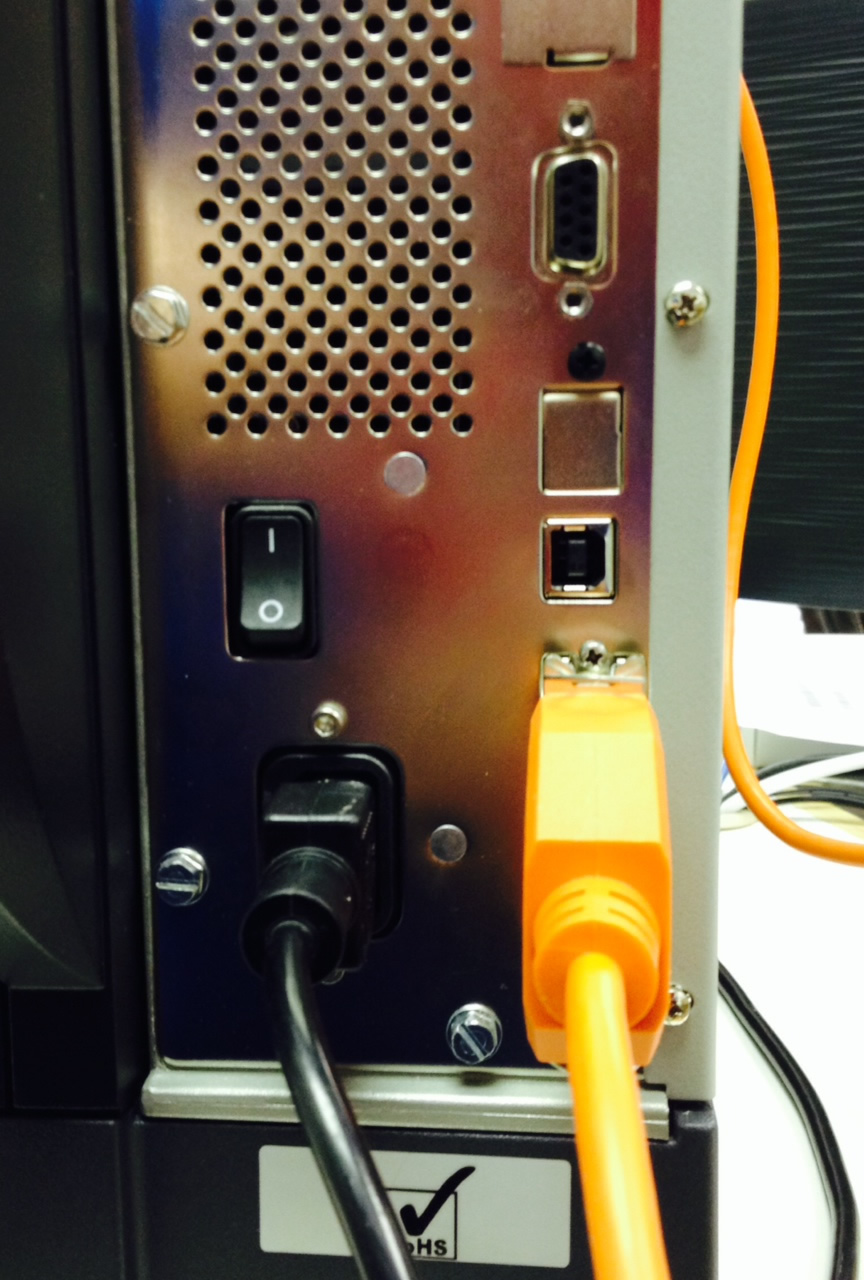
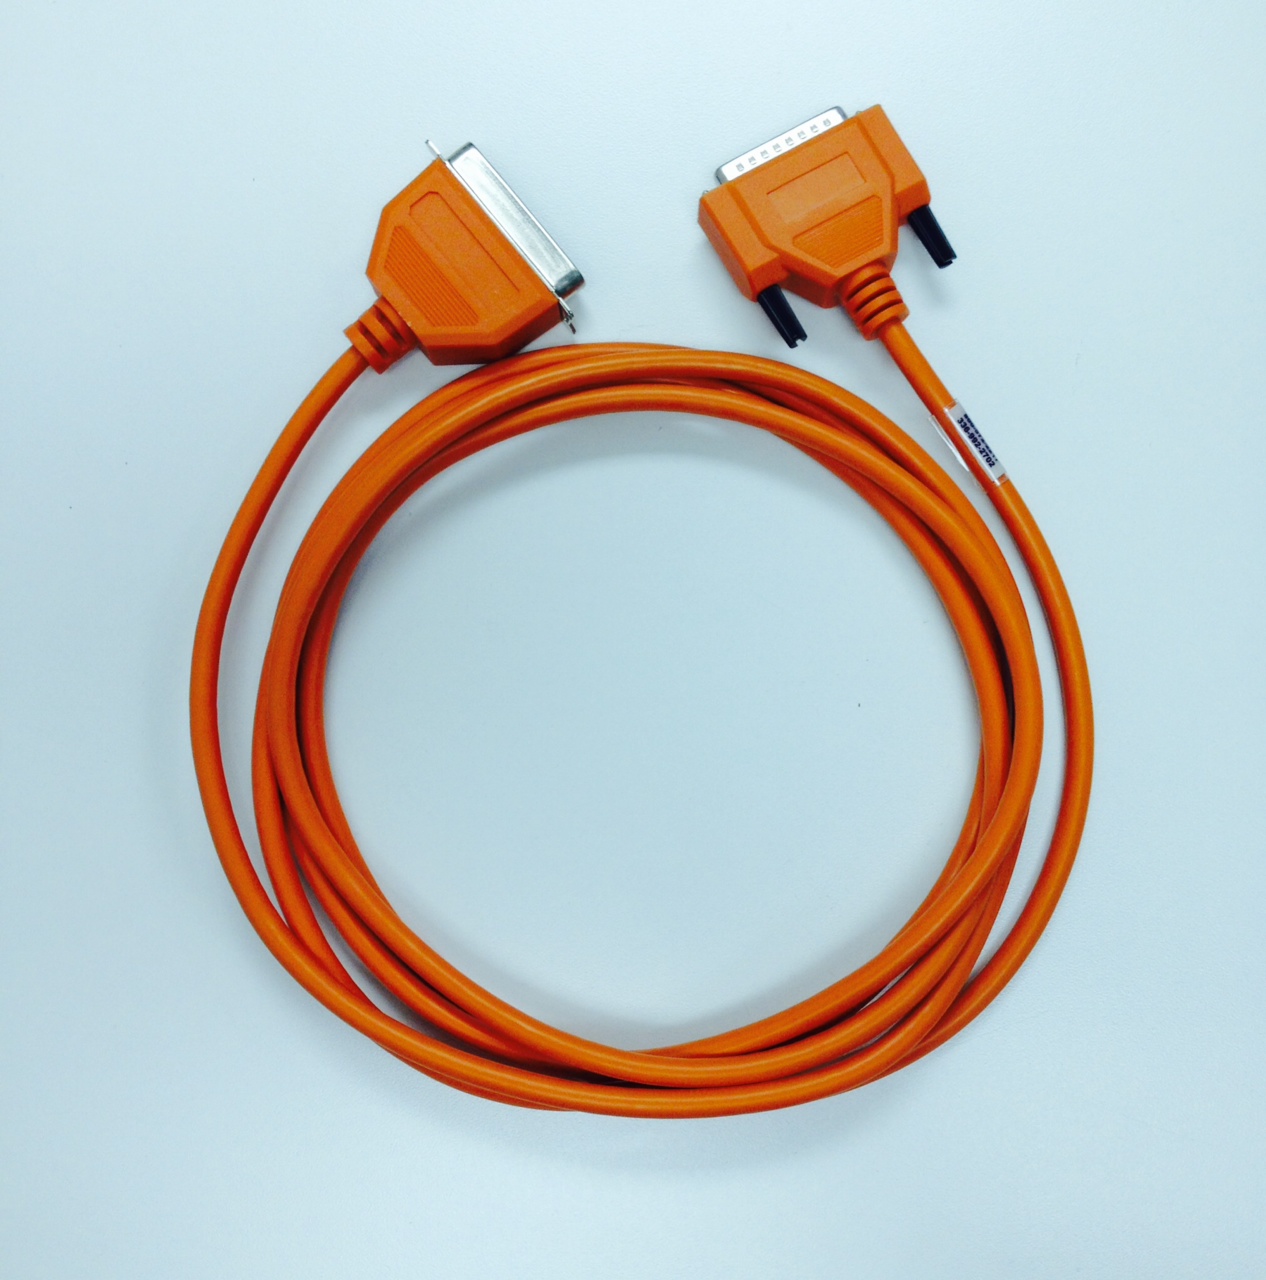
STEP ONE - HOOK UP YOUR PRINTERHook up and turn on your imageEZ® printer. Make sure that you are using a "Parallel Cable".
|
|---|
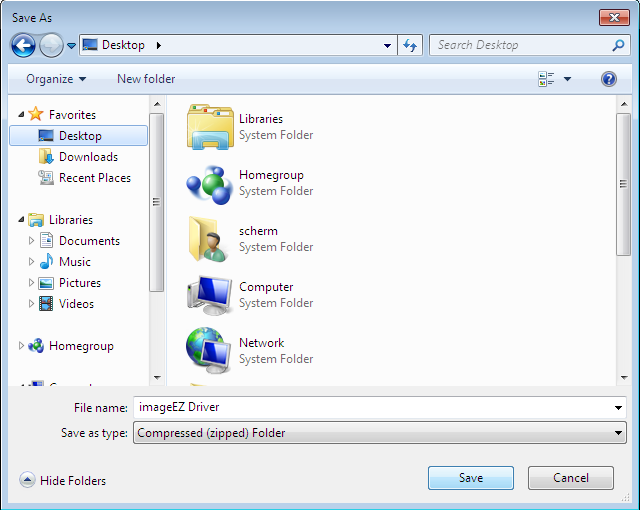
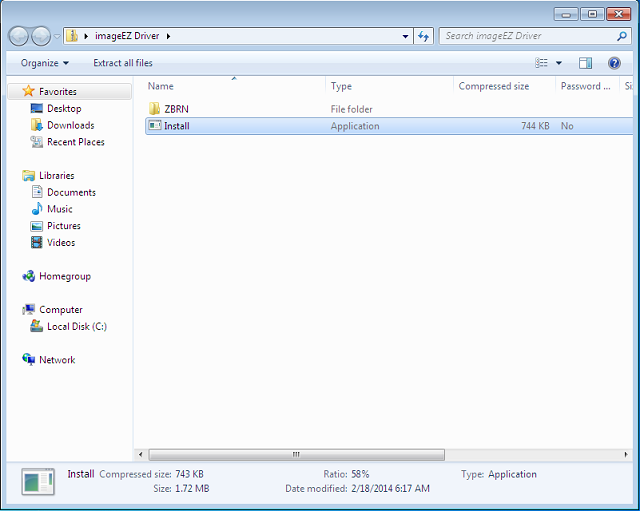
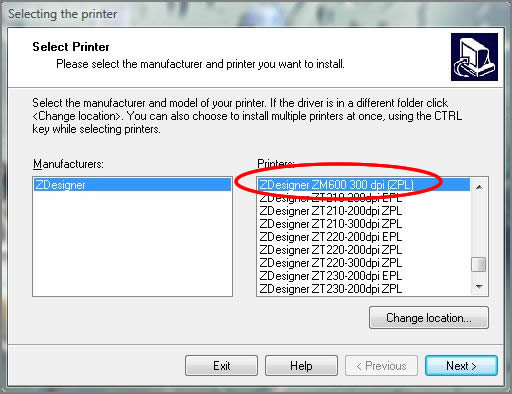
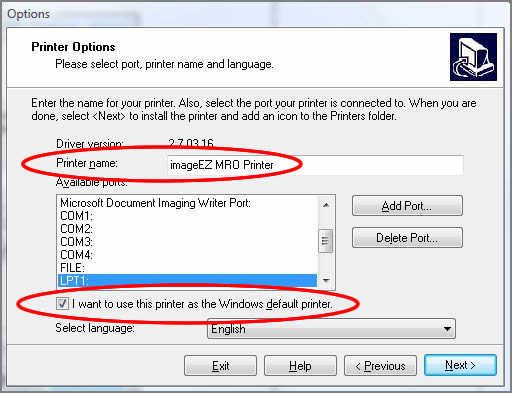
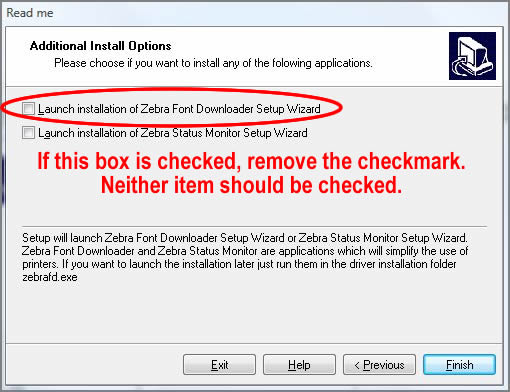
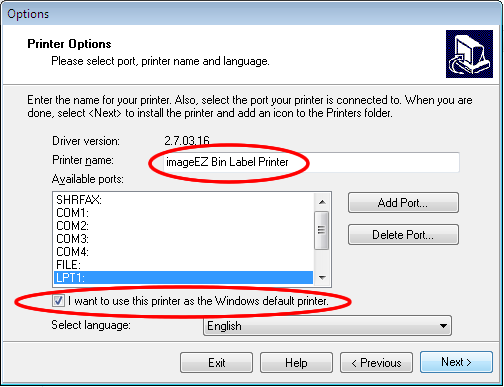
STEP TWO - DRIVER DOWNLOAD & INSTALLATION Click the printer icon to the right to download the current imageEZ Print Drivers. Choose to Save the file to your computer desktop and click Save. See image below. Now go to your desktop and locate the saved file called "imageEZ Driver". Double click on the file to open the directory. Then double click on "Install" to begin the installation process. If Windows asks you if you want to allow the program to make changes to your computer, click Yes. See image below. The Install Wizard will now begin. Click Next to continue installation. Then choose install printer and click Next again. On the next screen, in the printer name field, rename the printer to 'imageEZ MRO Printer'. Also choose whether or not you wish to make this your default printer selection. Then click Next. See image below. On the last page remove the check mark from the box that says 'Launch installation of Zebra Font Downloader Setup Wizard'. Then click 'Finish'. Congratulations! You have just set up your new imageEZ MRO Print Driver.
|
IMPORTANT 1-800-572-2217 |
|---|
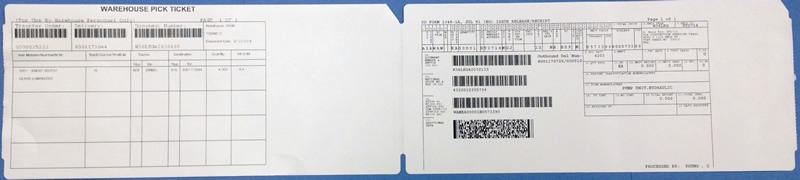
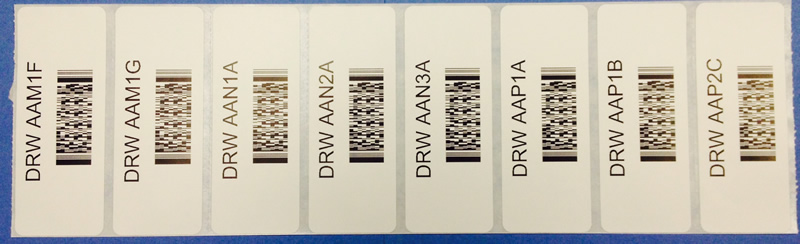
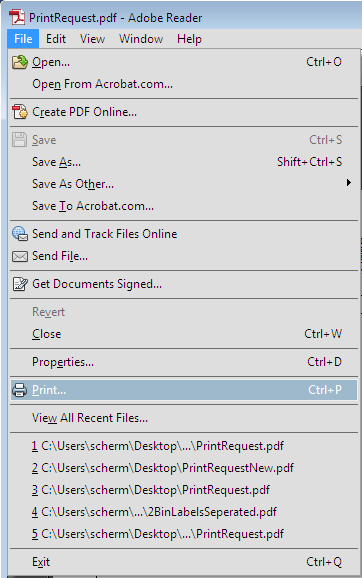
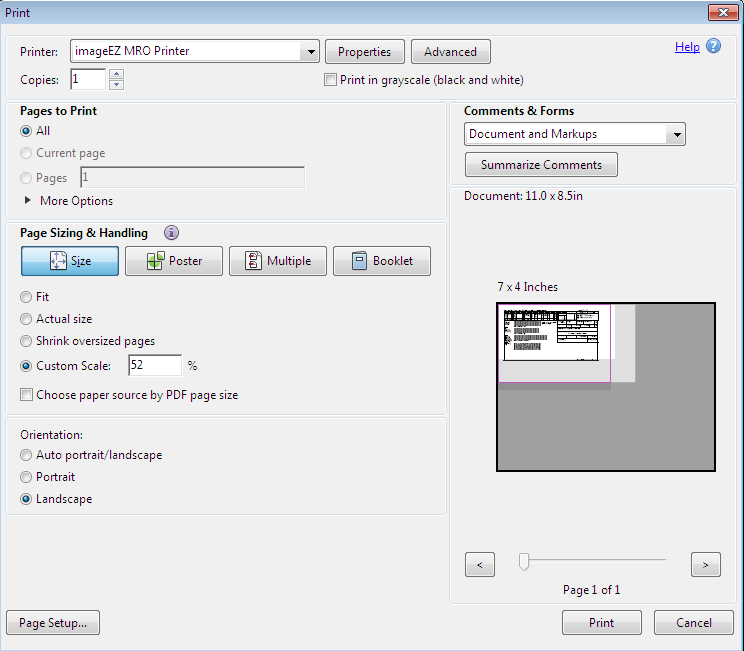
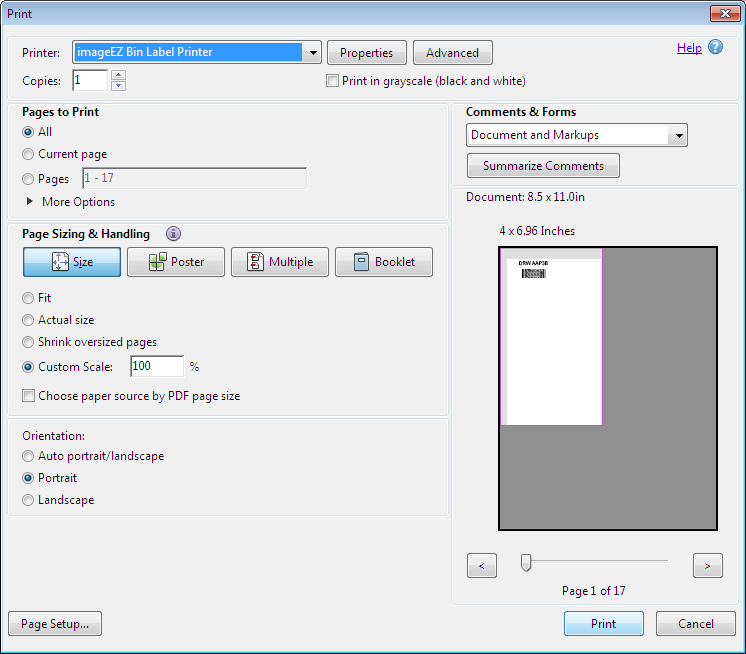
PRINTING MRO's and Bin LabelsThis is the procedure you will follow every time you print an MRO or Bin Label. GCSS Army will prepare your document in a PDF format. You will view the documents in the Adobe Reader version XI application. While the document is open in Adobe Reader go to the File Menu at the top left corner of the window. Choose 'Print' from the drop down options. See image below. MRO PRINTING
BIN LABEL PRINTING
|
|---|